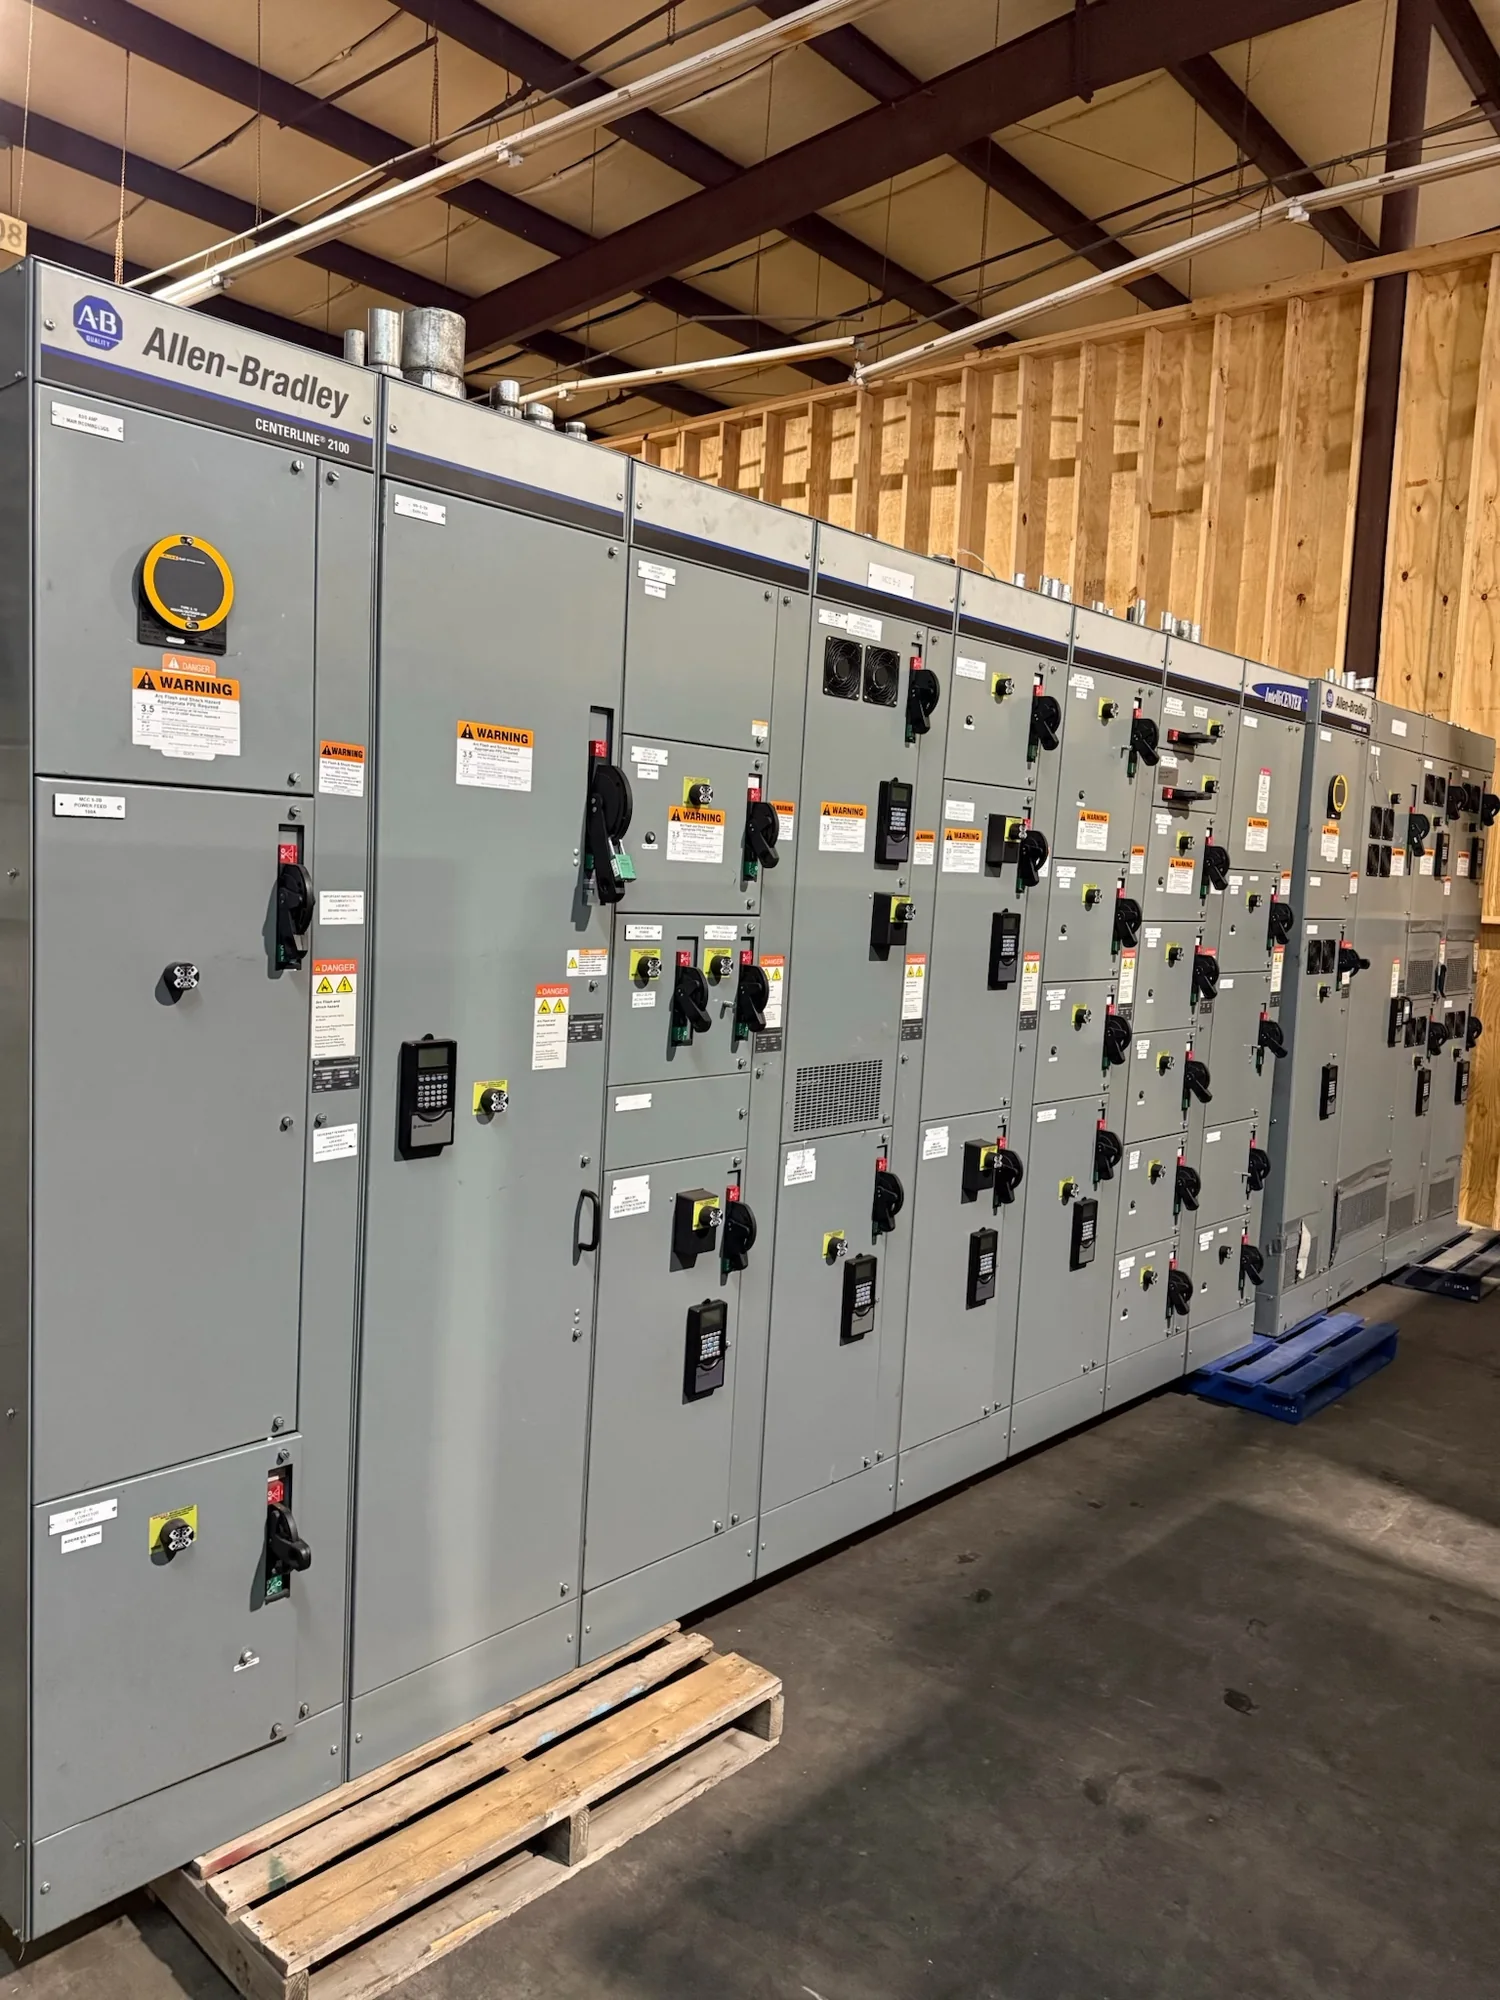
When Sectional Shipment Makes Sense
A switchgear lineup can sometimes be divided into shipping sections, but the practical answer depends on the design and the complete route from the builder to the installation location. Overall length, width, height and weight matter, as do turning radii, bridge or road restrictions, carrier equipment, unloading access and the path through the building. A unit that fits a truck may still be difficult to move through a doorway, corridor, elevator or operating area. Sectioning may help address those constraints, but it adds interfaces that must be planned, protected and reassembled correctly. It is not simply a matter of separating the lineup wherever convenient. Early in the project, compare the proposed shipping dimensions with the carrier’s route and the site’s actual access conditions. The project team can then evaluate whether shipment in sections is appropriate and identify design implications before fabrication details are finalized.
Define Transport and Handling Limits Early
Provide the manufacturer with the delivery address, unloading arrangements, receiving hours, route restrictions and any known doorway, elevator or floor-loading limits. Share the maximum package dimensions and weight that the carrier or site can accommodate, rather than relying on approximate equipment-room measurements. Consider how the shipment will be lifted, moved and staged: crane access, forklift capacity, rigging clearances and available laydown space can all affect feasible section sizes. Confirm who arranges transportation, unloading and movement from the receiving point to the final location, and whether temporary storage is expected. These details help the design and shipping plan account for practical handling needs without assuming that every route or delivery condition is suitable. If measurements or access conditions are uncertain, arrange a site review before they become schedule-critical. A coordinated transport plan can reduce the risk of rejected deliveries, difficult moves, damage or costly changes after equipment is already in transit.
| System | Voltage, phase, current and available fault current |
|---|---|
| Configuration | Lineup, protection, controls and enclosure as specified |
| Compliance | Applicable standards and listing confirmed for the assembly |
| Delivery | California and nationwide; schedule confirmed by quote |
Plan Bus Splices as Designed Interfaces
Where a lineup divides, electrical and mechanical connections between sections become critical design interfaces. Bus splice locations and connection details should be established for the specific equipment, including the arrangement of phase and neutral conductors, grounding connections, joint hardware, insulating components, clearances and required access. The connection must preserve the intended electrical path and fit the enclosure geometry after the sections are positioned and aligned. Project requirements such as current, voltage, short-circuit withstand and environmental conditions are design inputs for qualified professionals; they should not be inferred from the fact that sections can be shipped separately. Ask how splice materials will be protected and identified for shipment, what connection instructions will accompany the equipment, and what inspections or checks are required after assembly. Do not alter bus, drill new holes or substitute hardware in the field without approved direction. A planned splice is a defined part of the assembly, not a general-purpose field modification.
Coordinate Field Assembly and Verification
Reassembly involves more than bringing enclosure edges together. Sections must be placed in the specified order, aligned, secured and connected using the instructions and hardware intended for the design. Depending on the equipment and project, work may include joining the enclosure, completing bus and grounding connections, installing barriers or covers, and restoring components removed for shipment. The site team needs suitable tools, access, lifting arrangements and time to perform that work safely. Before energization, qualified professionals should inspect the completed assembly and determine the appropriate checks and commissioning steps under project requirements and applicable codes. Protection settings, interlocks and other functions may also require review as part of the overall installation process. The exact tasks and verification methods depend on the equipment and scope; establish them with the manufacturer and responsible electrical professionals rather than assuming that field assembly is limited to tightening visible connections.
Assign Reassembly Responsibility Before Ordering
The purchase scope should state who is responsible for unloading, positioning, field joining, electrical connections, inspection and commissioning, and should distinguish manufacturer-supplied instructions from installation labor. Confirm whether the project expects the manufacturer, an electrical contractor or another qualified party to perform each task, and who resolves questions if site conditions differ from the approved layout. Identify required personnel qualifications, tools, access, permits and coordination with other trades. Ask what documentation will be supplied, how shipping sections and loose components will be labeled, and what support may be available during installation; confirm the scope and timing directly, since these depend on project review. Keep the approved drawings and assembly instructions accessible to the field team, and route proposed deviations through the responsible design and equipment contacts before proceeding. Clear assignments reduce gaps between delivery and startup. For a project with tight transport limits or a compressed schedule, raise sectional shipment early so design, logistics and field responsibilities can be reviewed together.